Thursday, March 19, 2015

Having Your Cake and Eating It Too

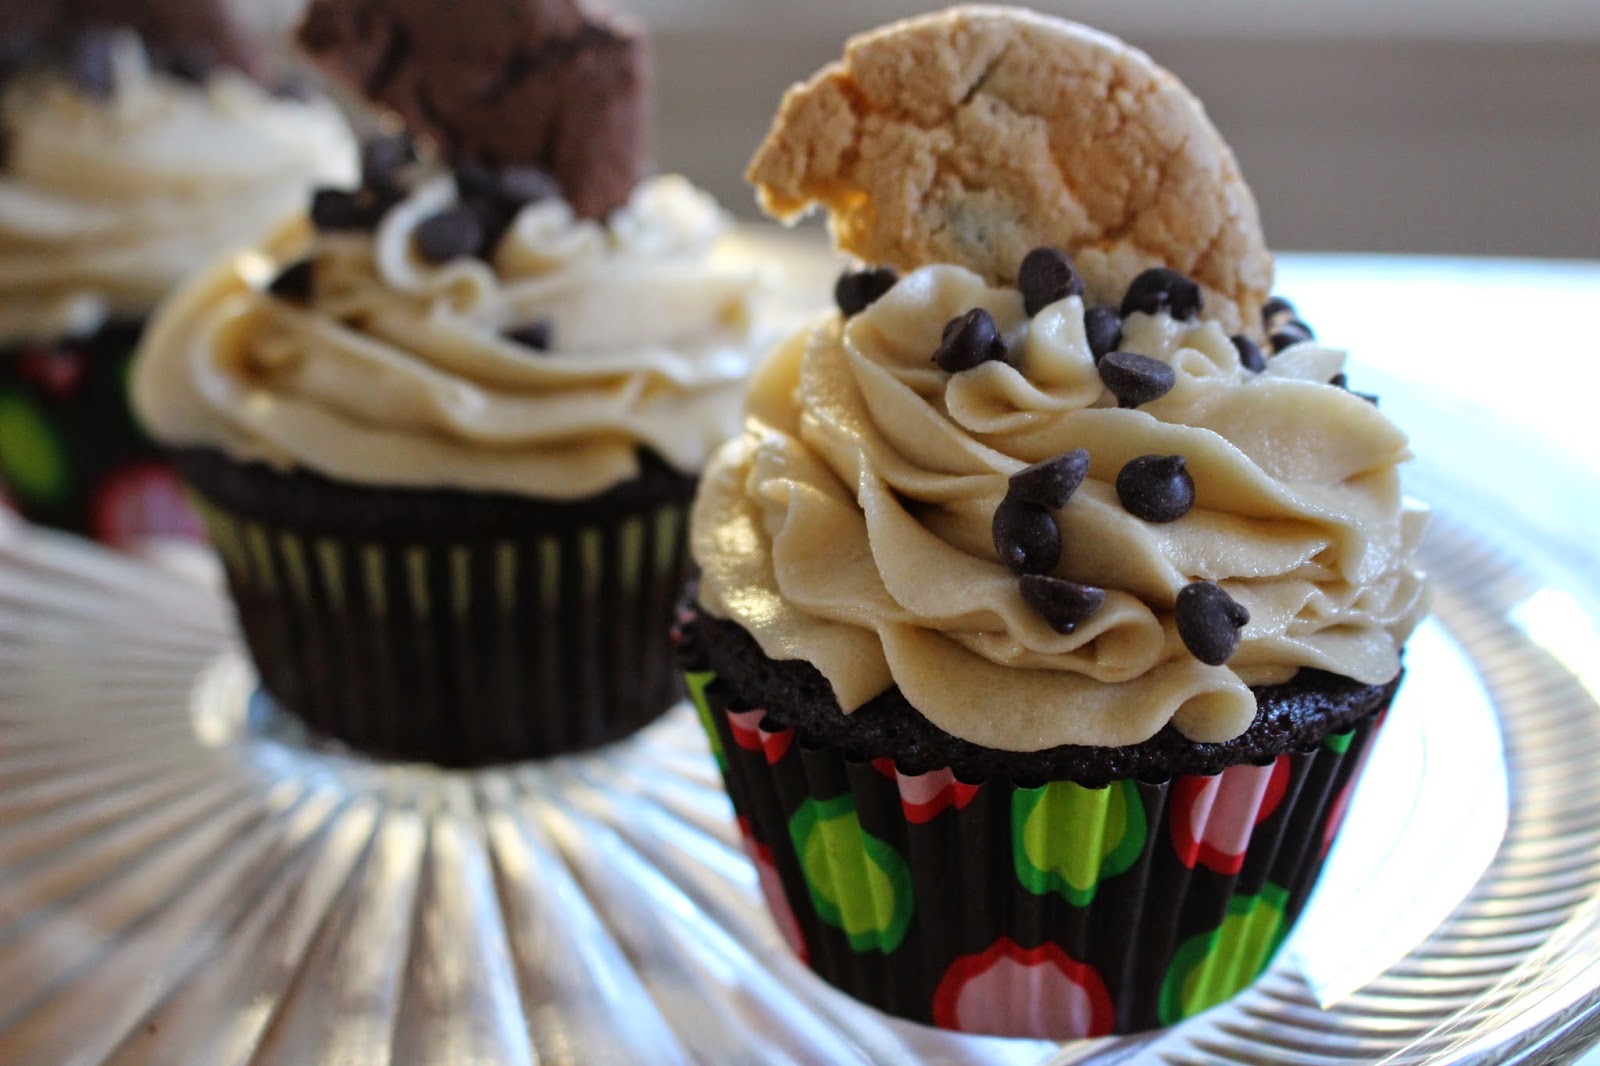
Dairy and Soy Free chocolate cupcakes for Graham's third birthday party.  His mama is also dairy and soy free while nursing Graham's new baby brother so she enjoyed these as well!  Happy family!


As I nursed my daughter tonight, my thoughts turned once again to the breastfeeding journey we have been on over the last year.  Becoming a family of four has been wonderful and special, but it has also been extremely trying.  For me, breastfeeding Liz has been difficult, due to her food intolerances. My experience living on a restricted diet makes baking allergen free cakes very personal for me.  Over the last few months, I have made gluten free, dairy free, soy free, egg free, nut free, vegan, and sugar free cakes and cupcakes for people all around my area, and it has been an extremely rewarding and emotional experience. 

Both of my children suffered from intolerances as infants.  My son Sully was dairy and soy intolerant, and I cut these elements out of my own diet for the ten months I was nursing him.  My daughter was a little more complicated.  After several different issues during her first few weeks of life, including a meningitis scare, she was diagnosed with dairy, soy, egg, nut, and wheat intolerance, but I was determined to breastfeed her.  Although my first reason was the benefits breast milk gives, I also wanted to nurse because I knew she would be my last baby, and therefore my last chance to experience this part of motherhood.  I cut all these elements out of my diet which was, to say the least, difficult.  My wonderful husband was able to cook delicious meals for me and somehow we got through it.  Looking back, I’m not sure what I ate during those times.  Although Lizzy is now over a year and I’m still nursing, I have been able to work all these allergens back into our diets.  Miraculously, neither of my children have so far exhibited lasting allergies - I am definitely grateful.

I have heard a lot of debate concerning why so many children have allergies.  For me, when I cut out allergens from my diet, my babies were happier, so I was happy.  And now, I’m a baker and I’m in the business of making other people happy.

I think it is a great privilege to make allergen free cakes for special occasions.  When I deliver a birthday cake or cupcakes for a child with allergies, I do so with a great awareness of how he or she feels.  I am all too aware of what it’s like to be deprived of delicious food at most parties and when out at restaurants: although you feel like you've explained your restrictions a hundred times, people continue to offer you foods you can't have.  Then there's the explaining the restrictions to servers who often are rude and condescending.  Then of course there's the individuals who want to spark a debate about the validity of food sensitivities in children.  I can’t imagine going through this as a child.  To go to a friend’s birthday party and see a fantastic cake, and feel that you can’t have the same for your birthday.  I love the idea of giving these children that fabulous cake, and proving that it can not only look great, but taste great as well!  When I’m up late making a special birthday cake and I start to get tired, I think about that little guy the next day who hasn’t had a piece of cake at his friends’ parties, and I get my second wind.

When I was nursing my first baby, on Valentines Day my husband came home with a dozen cupcakes from a specialty baker located about 20 miles from our house.  They were dairy and soy free.  It had been months since I had had cake, or any dessert at all, which for me is an eternity.  Those cupcakes were the most delicious things I had EVER tasted, and I think will ever taste.  That gift was one of the best gifts I have ever received.  The experience gave me the idea of starting a business on the north shore specializing in baking for nursing moms and children with allergies.  Eating food together is a special part of being a family, and sharing a birthday cake is a very special part of being a kid.  I love being a part of making that possible for everyone!

Let them {all} eat {good} cake!
~Sugar Dish  

Monday, March 9, 2015

A Very Busy Few Weeks!

The last month has been so busy for Sugar Dish, that I haven't had the time to write about it!  But fortunately, I have had the opportunity to work on some great cakes and cupcakes! Here's a bit about what I've been working on.

Valentine's Day was very exciting. A few weeks beforehand, I created this truffle cupcake box to use as an entry in the Macaroni Kid Valentine's Cupcake Contest. When thinking of my concept for the design, I didn't want to consult Pinterest or any cookbooks for ideas. So I headed to the store and bought a big ole box of chocolates, made a bunch of mini chocolate cupcakes, and frosted them with a traditional fudge frosting. Every now and then, when you start making something, for one reason or another you think, "Damn this is going to be good." And this was one of those times. It was kismet, and the cupcakes were awesome. After frosting, I topped with a chocolate truffle and dipped the cupcake in chocolate ganache. I then decorated with sprinkles, tinted sugar, conversation hearts, melted white chocolate, and nuts.  Then I popped them into the now empty chocolate box.  I was so happy with the outcome - it was beautiful!  But most importantly, these cupcakes tasted like chocolate orgasms, to steal a phrase from Judy Rosenberg.  I posted the pictures on Sugar Dish Bakery's Facebook page, and immediately began to receive orders, including dairy free, gluten free, and sugar free versions!  I then sent the photo to Macaroni Kid for the contest, and gee wiz, a few weeks later I found out I was one of the five winners!  Hot damn!


Spurred by my creative genius, I decided to make a cupcake bouquet of roses for Valentines Day as well.  I made 12 vanilla cupcakes and decorated them like light and dark pink roses.  Check out this Rosette Tutorial for details.  Then, I headed to the local florist shop to buy a foam ball and some greenery.  As I am a genius after all, I took my two year old along for the ride.  He loved the florist shop, but it was one of the most stressful 10 minutes of my life being alone with a toddler loose in a flower shop.  You thought a bull in a china shop was supposed to be bad?  Awesome.  Anyway, I filled a small vase with greenery, plopped the foam ball in it, and used two tooth pics per cupcake to stick them into the foam ball.  I also used the greenery as filler in the spots you could see the foam.  I posted the photos on Facebook as well, and they were a smash hit!  More orders, many allergen free, ensued.  BOOM!

The two weeks leading up to Valentine's Day were a bit of a sugar blur, but here are some more photos of my orders:

Three beauties.

Dairy and soy free mini cupcakes

Shortbread cookies dipped in ganache!

 After Valentine's Day, I took a deep breath and had a large glass of wine.  Then, I made some mini Thomas the Train cupcakes.  These guys are dairy, soy, and nut free, and each Thomas is about one inch tall!  Choo Choo!


Next up was my sweet baby Lizzy's first birthday, so I focused my efforts, as I needed to make a two tier birthday cake, a smash cake, and 80 cupcakes for her party.

For her smash cake, I made a completely allergen free vanilla cake with rosette frosting.  No dairy, soy, eggs, nuts, or gluten in this one!  Lizzy loved it and looked adorable in her photos!


Then, for the main event!  The birthday cake had a vanilla first tier, and the second tier was an allergen free vanilla cake, using the same recipe as Lizzy's smash cake.  I covered both layers with a white fondant, and did ombre style fondant ruffles on the bottom layer.  For the top layer, I cut out fondant circles and sprayed with an edible gold spray to get the confetti look.  I wanted the confetti to match the confetti balloons at her party.  It was a huge success and I love the way it turned out!


Phew.  I'd like to say that I am so exhausted that I'm taking a long vacation.  But I'm not!  It is now March, which I have always called "birthday month!"  It seems that people really like to make babies during the summer months, because a lot of people (including me!) were born in March.  I will be very busy!!!

Mama needs a drink...

Monday, February 16, 2015

Another Snow Storm, Another Activity for Toddlers

Well, in my last post I wrote about finding activities for my toddler after the epic snow storm we had. Since then, I've lost count of how many epic snow storms we've had.  I think it's between three and fifteen.  Basically, we have a ten foot tall snow drift in our front yard.  Even when it's not blizzard conditions outside, it's been frigid and windy.  Forget "Winter Storm Watches," the National Weather Service should start publishing "Toddler Freak-Out-Tantrum-Jesus-What's-Happening-To-My-Kid Watches."

We were able to get out of the house today which was great.  During our venture out, we went to Home Goods, one of my favorite places ever.  While looking for a first birthday present for Lizzy from Sully (who is 2.5 years old and felt that what Lizzy really needed was a new train set), I saw this neat kit to make and paint your own bird house for only $6.99.  I have been wanting a bird house to put outside the dining room window so the kids can watch the birds.  Score!

After Sully's nap, I assembled the bird house with him avidly watching and getting ready to paint.
I would highly recommend this kit.  It was very easy to assemble, and the only tool you need is a hammer.  The kit comes with nails, hooks, and even wood glue.  Assembling furniture and other objects is NOT my forte, and this took me about five minutes and was very easy!  Then I covered the table with some cardboard and Sully got to work!

He had a great time and I can't wait until spring when we can hang it up.  If Queen Elsa decides to ever put an end to this endless winter, that is.

~Sugar Dish

Monday, February 2, 2015

A Snow Day Activity: Homemade Animal Crackers

We've had an epic week of snow here in New England! Last Tuesday we got about 20 inches of snow, more on Friday, and today we're in a white out that's supposed to yield 10 inches or so. Snow days can be fun, but with a baby and a toddler in the house, it becomes torturous as we sit around desperately trying to find things to keep our kids active while we all slowly slip into madness.

Today, I pulled out some animal cracker cutters my mom gave us from Williams Sonoma. The box included a recipe to make the crackers, so I decided to make them with my 2.5 year old. It turned out great with delicious animal crackers, and he really enjoyed it! He loved stamping out the animals and talking about what sounds they make. They also came in a cute circus train box, and Sully played for quite a while with it on his train tracks.

I've included my version of the recipe below. My alterations basically make a simplified version of
the original, because something is telling me Williams Sonoma's test chefs aren't working with a toddler when they come up with this stuff. There was also a spice I didn't have in my cupboard which I substituted for. The cookies still turned out great!

Sully loves to help me mix up the dough.  I recommend pre-measuring your ingredients and having everything in bowls and ready to go for your toddler to dump in the mixing bowls.

The Williams Sonoma animal cracker cutters were super cute and easy to use, and I would recommend them if you get an opportunity to purchase. However, you could use any cookie cutters for this recipe, or even a glass for round crackers if you don't have a cutter!

Here we go!

Ingredients:
2 1/2 cups all purpose flour
1 teaspoon baking powder
1/2 teaspoon salt
1/8 teaspoon nutmeg
1/8 teaspoon cinnamon
12 tablespoons butter, at room temperature
1 cup sugar
1 egg, at room temperature
1 teaspoon vanilla extract
1 tablespoon water

In a small bowl, whisk the flour, baking powder, salt, nutmeg, and cinnamon.  Set aside.

In a large bowl, beat the butter until creamy.  Slowly add the sugar until combined, scraping down the side of the bowl as you go.  Add the egg and vanilla and beat until combined, stopping once to scrape the sides of the bowl with a spatula.

Add half the flour mixture and beat until combined, and then add the second half.  Add the water as needed until the dough starts to pull away from the sides of the bowl.

Remove the dough from the bowl and split in half.  I gave one half to Sully and he kneaded it and rolled it into a ball, while I did the other half.  Roll it up, press it into a disc, wrap in cellophane, and put it in the fridge for 2 hours.  During these two hours, practice animal sounds and play with the zoo choo choo train with your toddler.

Remove the dough from the fridge and let sit for five minutes.  Preheat the oven to 350 degrees.  Dust your work surface and rolling pin with flour, and roll the dough out to 1/8 inch thickness.  Use the cutters to create your cookies, and place them an inch or so apart on a cookie sheet lined with wax paper.

Bake for 12-14 minutes, or until golden brown.  Remove and cool on a cooling rack for a few minutes.  Remove the cookies to cool completely directly on the rack.

Enjoy!

~Sugar Dish

Thursday, January 29, 2015

Dairy and Soy Free Chocolate Cupcakes!


These cupcakes are delicious.

As I covered in last week's post, I have cut out a myriad of foods while nursing, due to my daughter's intolerances. I am currently free of dairy, soy, and nuts. However, as you know, I have a passion for cupcakes. I also have had a rather rough stretch at work.  So, today I did what was only natural. I made a s**t ton of dairy, soy, and nut free chocolate cupcakes, complete with similarly allergen free chocolate chip cookie dough buttercream frosting.

I worked pretty hard perfecting this recipe, but it was oh so worth it.


As a base for the cupcakes, I used my favorite chocolate cake recipe. I have used this recipe countless times, and it's always perfect.  You can find the recipe on a blog called Tracey's Culinary Adventures. This is a fabulous blog, with many wonderful recipes, so check it out.

For my allergen free version of the recipe, see below, and happy baking (and eating)!

Chocolate Cupcakes

1 1/2 cups all-purpose flour
3/4 cup unsweetened Dutch-process cocoa powder
1 1/2 cups sugar
1 1/2 teaspoons baking soda
3/4 teaspoon baking powder
3/4 teaspoon salt
2 large eggs
3/4 cup rice milk
3/4 tablespoon lemon juice
3 tablespoons canola oil (do not use vegetable oil, as it has soy)
1 teaspoon vanilla extract
3/4 cup warm water

*Combine the 3/4 cup rice milk and 3/4 tablespoon lemon juice.  Let sit for 10 minutes before adding to the recipe as noted below.

Preheat oven to 350 F. Line muffin pans with paper liners.

In a large bowl, whisk the flour, cocoa powder, sugar, baking soda, baking powder and salt together. Add the eggs, rice milk/lemon juice mixture, oil, vanilla extract and water and blend until the mixture is smooth and all of the ingredients are evenly distributed.

Distribute the batter evenly among the cupcake liners, filling each about 2/3 full. Bake for about 20 minutes, or until the cupcakes spring back when lightly touched and a toothpick inserted in the center comes out clean. Remove the pans to wire racks and let the cupcakes cool for 5-10 minutes, then remove them from the pans and cool completely on the wire racks.

Chocolate Chip Cookie Dough/Buttercream Frosting


This frosting is made in two parts, and "swirled" together.

12 tablespoons Earth Balance dairy and soy free butter
1 ¾ cups powdered sugar
1/3 cup packed brown sugar
1 ½ tablespoons coconut or rice milk
1 tsp vanilla extract

With an electric mixer, beat the Earth Balance and sugars until creamy.  Add the rice milk and vanilla and beat until smooth.

Cut the end of a 12" pastry bag, and fill with the frosting.  Set aside.

½ cup Earth Balance dairy and soy free butter
¼ cup organic non-hydrogenated shortening
3 cups powdered sugar
2 to 3 tablespoons So Delicious Coconut Milk Coffee Creamer
1 teaspoon pure vanilla extract

With an electric mixer, beat together the margarine and shortening for one minute.  Add the powdered sugar and beat until creamy.  Add the two tablespoons coffee creamer and vanilla, and beat until smooth.  Add another tablespoon of coffee creamer if needed and beat the buttercream until light and fluffy.

Cut the end of another 12" pastry bag, and fill with this frosting.  Cut the end off a 16" bag and use a 1M star tip. Place both 12" bags in the 16" bag. When the cupcakes are completely cool, pipe the frosting on each cupcake starting on the outside edge and swirling up. Garnish with chocolate chips.

Yields 18 cupcakes

~Sugar Dish

Sunday, January 25, 2015

Dairy, Soy, Wheat, Nut, and Egg Free Cupcakes

No, I'm not kidding.

Like many nursing moms, I cut out foods from my diet due to my babies' intolerances. With my son I went dairy and soy free, which I thought was difficult at the time...If only I knew what adventures were ahead of me with my daughter!  At the height of Lizzy's issues, I was dairy, soy, egg, nut, wheat, fish, and shellfish free.  Needless to say, it has been a difficult journey nursing her.

These types of intolerances are very common for babies, especially dairy and soy.  I have heard that 50% of babies are dairy intolerant.  Most babies grow out of this as their systems develop.  Lizzy was diagnosed only a few weeks after she was born.  Looking back, I'm not sure what I ate for the roughly five months she couldn't tolerate these foods.  I then was able to slowly work back in fish, shellfish, eggs, and wheat. Today I am only dairy, soy, and nut free.  Lizzy is almost one year old, and although I am sad to see my baby all grown up, I am SO looking forward to finally eating EVERYTHING.


I wanted to come up with a cupcake recipe free of all the allergens I cut out while nursing Lizzy. It was not simple, as I had to cut out almost everything tasty and delicious.  But I am glad to say that I have been successful!  These cupcakes prove that even allergen free desserts can be delicious!

I looked at a lot of different allergen free recipes, but most were just dairy, nut, and gluten free.  I found it particularly difficult to eliminate both dairy and soy from recipes, as most butter substitutes seem to have soy in them.  I had planned to use non-hydrogenated shortening instead of butter, but at Whole Foods I was pleased to discover Earth Balance now makes a soy free butter substitute!  Eggs were also difficult.  I chose to substitute eggs for half a mashed up banana.  I found this substitution list, which is very helpful!

In the end, I used this recipe for chocolate chip cookie dough cupcakes as my base.  This is a very clever recipe, but I made alterations to remove the soy and egg components of the original recipe, as well as a few alterations to suit my own preferences.  Here is my version of the recipe!


Dairy, Soy, Egg, Nut, and Wheat Free Chocolate Chip Cookie Dough Cupcakes
For the Cookie Dough Filling:
  • 3/4 cup gluten free flour
  • 1/8 teaspoon baking soda
  • 1/8 teaspoon salt
  • 4 tablespoons unsalted vegan butter, melted (I used Earth Balance soy free version)
  • 1/4 cup packed light brown sugar
  • 2 tablespoons sugar
  • 2 tablespoons rice milk
  • 1 teaspoon vanilla extract
  • 1/2 cup mini chocolate chips (I used Enjoy Life Foods brand which is allergen free)
For the Chocolate Cupcakes:
  • 1 cup gluten free flour
  • 1/2 cup unsweetened cocoa powder
  • 1 cup sugar
  • 1/2 teaspoon baking soda
  • 1/4 teaspoon salt
  • 3/4 cup hot water
  • 1/2 cup canola oil (don't use vegetable oil, as it contains soy)
  • 1/2 mashed banana (to replace 1 egg)
  • 2 teaspoons vanilla extract
For the Cookie Dough Frosting:
  • 12 tablespoons unsalted vegan butter (I used Earth Balance soy free version)
  • 1 3/4 cups powdered sugar
  • 1/3 cup packed brown sugar
  • 1 1/2 tablespoons rice milk
  • 1 tsp vanilla extract
For the Garnish 
  • Mini chocolate chips
  • Chocolate chip cookies (optional)
  1. Start by making the cookie dough filling.  In a small bowl, sift together the gluten free flour, baking soda and salt.
  2. In a medium bowl, whisk together the butter, sugars, milk and vanilla until smooth.
  3. Whisk in the dry ingredients and the chocolate chips until smooth.
  4. Refrigerate for 15 to 30 minutes or until firm.
  5. Using a melon baller, scoop out dough into 12 balls.  Don't fill the melon baller completely.  If the balls are too big, it messes up the cupcakes. The balls should be no wider that 1/3 the width of your cupcakes.  Freeze for at least 30 minutes.
  6. While your cookie dough balls are in the freezer, make your cupcakes.
  7. Preheat the oven to 375ºF. Line a cupcake pan with 12-15 liners.
  8. In a large bowl, whisk together the flour, cocoa, sugar, baking soda and salt.
  9. Add the water, oil, banana and vanilla and whisk until smooth. Use a spatula to scrape the sides and bottom of the bowl to ensure all ingredients are combined.
  10. Fill each cupcake liner 1/2-2/3 full.
  11. Take your cookie dough balls out of the freezer and gently press a one ball into the center of each cupcake, only submerging the ball 1/2 way.
  12. Bake the cupcakes for 19-21 minutes, or until a toothpick inserted into the cupcake portion of the cupcake (not tested through the center where the dough is), comes out fairly dry. Chunks/pieces of cake are okay, just not moist batter.
  13. Cool the cupcakes completely before frosting.
  14. To make your frosting, in the bowl of a stand mixer, cream together the butter and sugars until smooth and creamy.
  15. Add the milk and vanilla and beat on high until well combined.
  16. Use a 1M tip and a pastry bag to pipe the frosting on each cupcake.  Top with mini chocolate chips and the cookie et voila!
~Sugar Dish

Saturday, January 17, 2015

Two Sweet Blessings


This weekend I had the honor of making not only mini cupcakes for a little guy's second birthday, but I also made his new baby sister a beautiful pink rosette cake.  Their parents apparently have super hero powers, and are throwing a joint birthday/welcome-to-the-world party for their children, only one week after baby girl was born!  Pretty impressive.


I was so pleased when this new mama asked me to make this cake for her baby girl -- what a great way to welcome a new baby into the world - with a beautiful cake!  I also got to sneak a peak of the baby when I delivered the cakes to them.  I think my creations will have a hard time standing out next to that little angel!  She's like a perfect snowflake.

While decorating these cakes, it was very important to me that the colors were perfect.  Once you learn how to make buttercream rosettes, they make for pretty quick work.  The most time consuming thing about this cake is tinting the frosting.  It is very important, because the ombre look of the cake adds sophistication, and is perfect for the birth of a sweet baby girl.  I have found that it takes a lot of thought and planning to make sure it is done correctly, especially if you're also going to be tinting frosting other colors for another project, like my blue cupcakes.

Whenever working with color, start with your lightest color and work towards the darkest.  For example, I first rolled out the white sugar paste and cut out the shape for the monogram.  If I had first tinted the dark pink or blue frosting, and then cut out the monogram shield, I may have gotten residual blue or pink on the white sugar paste.  After completing the monogram plate, I then made a large batch of buttercream, and split it into three equal portions.  I first tinted the lightest pink, using a very small amount of pink gel food coloring.  Once I was certain the color was right, I tinted the medium pink.  Once I mixed it up, I compared to the light pink to make sure it was what I wanted.  Keep in mind that tinted frostings deepen after sitting a few minutes.  If you go too crazy, all the sudden your colors may be too dark.  Repeat for the darkest pink, and then you're ready to go!


I started at the bottom of the cake and made the darkest layer of pink roses.  Then the middle, and then the top!  Then pipe on the monogram, top the cake with the monogram plate, and you're all done!


I then moved on to decorating the chocolate cupcakes.  I wanted these to be "sky inspired" cupcakes, so I split my buttercream in to two equal batches, and used the same strategy as above to tint a light blue and dark blue.  I then filled a 12" piping bag with the light blue, cutting the tip off the bag, and also filled and cut a second 12" bag with the dark blue.  Then, I put both of the bags in a 16" bag, after cutting the end off of that bag, and inserting my 1M frosting tip.  This gives you the swirl of the two colors.  I love the way it turned out!  Adding rainbow sprinkles completes the look for the birthday cupcakes!


I loved these projects because they brought together the elements I love most about cake making: a special celebration for special people, delicious flavors, artistic expression, and beauty.